
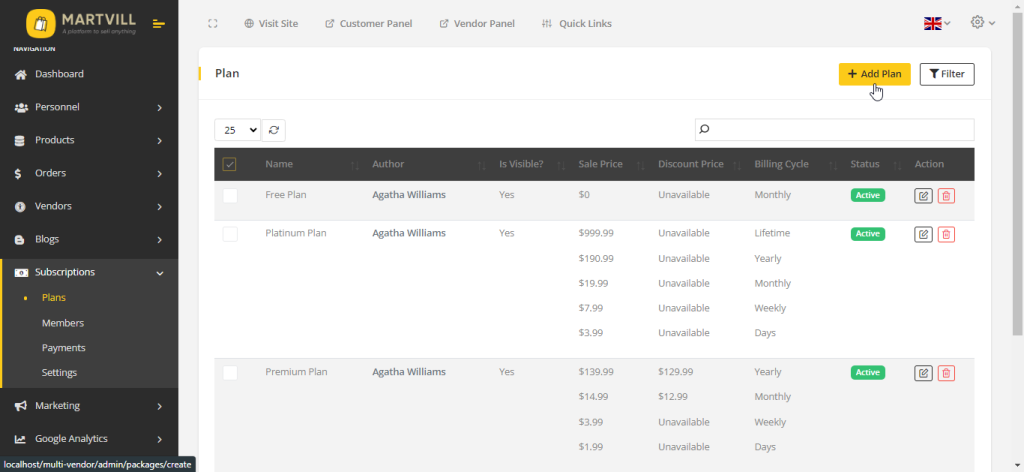
To use the subscription feature, the first step is to create a subscription plan. You can do this by accessing your admin dashboard and then proceeding to ‘Subscriptions’ and selecting ‘Plans’.
General
Once there, click on the ‘Add Plan’ button to initiate the plan creation process. This will lead you to the ‘Create Plan’ interface, where you can specify all the details for your subscription plan, such as pricing, features, and duration.
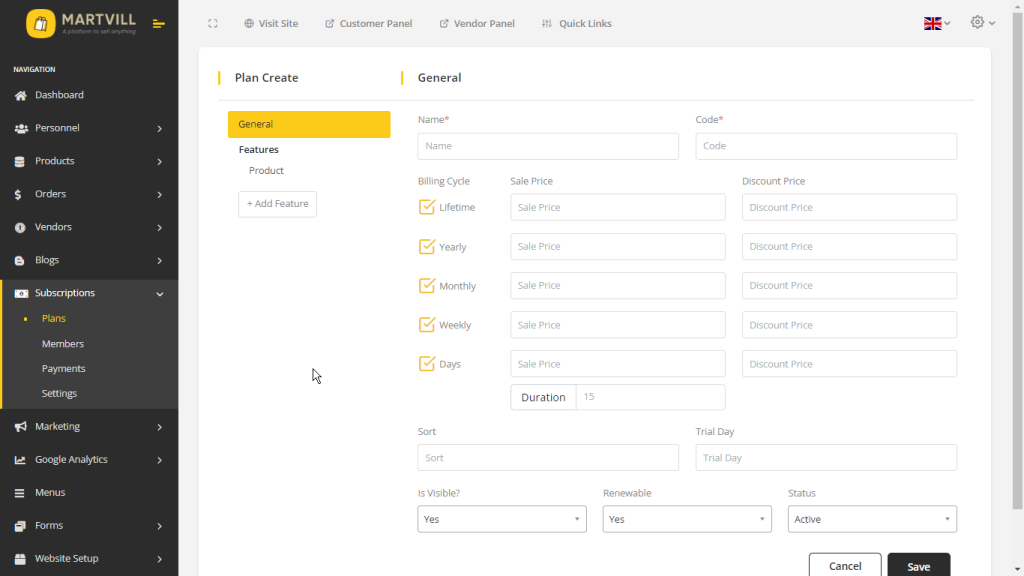
In the ‘Plan Create Interface’ within the ‘General’ section, you have the flexibility to define your subscription plan. Here, you can add the ‘Name’ and ‘Code’ for your plan to make it identifiable.
Billing Cycle: The unique aspect is the ability to set up ‘Multiple Billing Cycles,’ which allows you to create variations of your plan. You can select which billing cycles are available to users. If you unmark a billing cycle, it will be disabled, and users won’t see or access that specific plan option.
Furthermore, you can set ‘Sale Price’ and ‘Discount Price’ for each billing cycle. ‘Sale Price’ represents the original cost of the plan, while ‘Discount Price’ is the reduced price that users can purchase it for during promotions. If both prices are entered, the ‘Discount Price’ will be subtracted from the total cost during purchase. If there’s no ‘Discount Price’, only the ‘Sale Price’ will be displayed.
Additionally, there are different plan types, such as ‘Lifetime’ (plans that never expire), ‘Yearly’ (plans that expire after one year), and ‘Day Billing Cycle’ (plans that expire after a specified number of days, which you enter in the duration field).
Sort: In the field, you can specify a numerical value to determine the order in which your subscription plans are displayed. The number you provide here indicates the position or sort order of the plan in the list of available plans.
Trial Day: In the ‘Trial Day’ field, you can set a trial period for your subscription plan. This means you can specify the number of ‘days’ that users are allowed to try the plan for free before committing to a full subscription. It’s a great way to offer users a taste of what your plan has to offer.
Is Visible: If the option is set to ‘Yes’, the plan will be visible to users, and they can view and access it. However, if ‘Is Visible’ is set to ‘No’, the plan will be considered a private or hidden plan, and users won’t be able to see or access it. This is a way to control the visibility of your subscription plans.
Renewable: If the option is set to ‘Yes’, users will have the option to renew their subscription plan. However, if ‘Renewable’ is set to ‘No,’ users won’t be able to renew their plan, and they will need to choose a new plan when their current subscription expires. This setting determines whether subscription renewal is available to users.
Status: In the option, you have three choices to define the status of a subscription plan.
First, ‘Active’ signifies that the plan is currently available and users can subscribe to it and enjoy its benefits.
Second, ‘Inactive’ indicates that the plan is temporarily unavailable, and users won’t be able to access or subscribe to it.
Lastly, ‘Pending’ status is typically used when a plan is in the process of being reviewed or approved and isn’t yet active. During this stage, users won’t have access to the plan until it’s officially marked as ‘Active.
Features
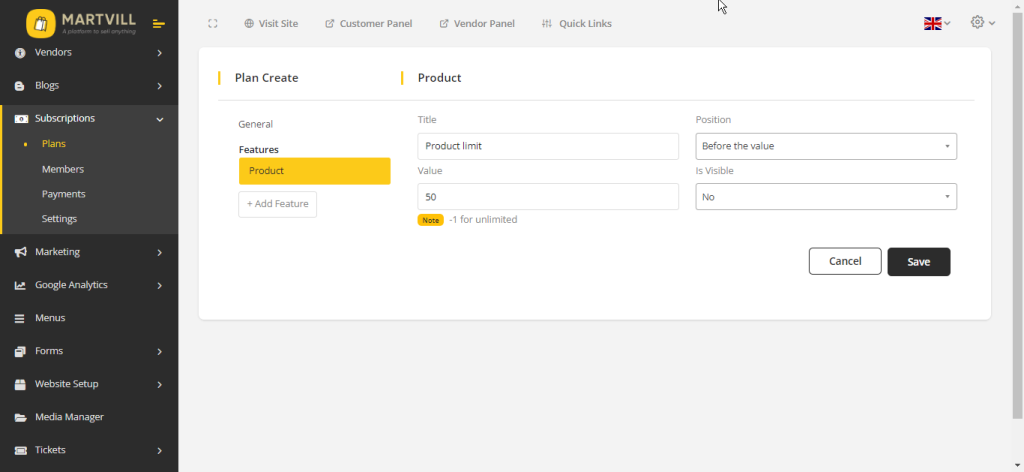
Product
Title: In the title field, you can customize the feature title as you see fit, allowing you to describe a particular aspect of the subscription plan.
Position: The Position option lets you decide whether the title appears ‘Before the value’ or ‘After the value’ when displayed to users. For instance, if the title is ‘Product limit’ and the value is ’50,’ selecting ‘Before the value’ will present it as ‘Product limit 50’ in the plan description.
Value: The Value field specifies the numerical limit for the feature, like the maximum number of products that a user can create. If the value is set to ‘-1,’ it means users can create an unlimited number of products.
Visible: The Is Visible allows you to control the visibility of this feature within the plan. When set to ‘Yes,’ users can see it, but when set to ‘No,’ the feature remains hidden from users.
Add Feature
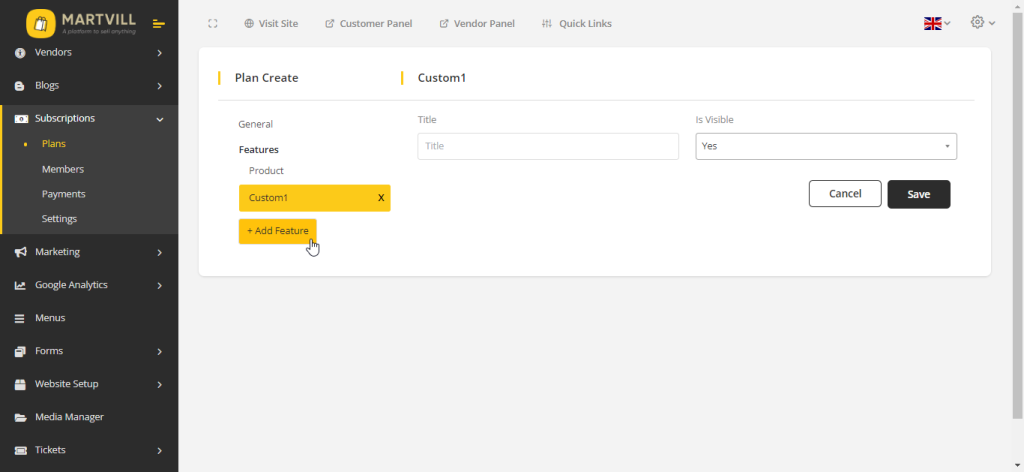
You have the flexibility to add custom features to your subscription plan as you see fit. These features will be visible to users when they view the plan details. Custom features can be useful for offering additional services or benefits that may need manual intervention, such as ‘urgent support’ for users who purchase the plan. This allows you to tailor your plans to meet specific user needs and requirements beyond standard offerings.
Once you have filled in all the necessary fields and configured your plan according to your preferences, click on the ‘Save’ button to create the plan. Your subscription plan will be saved and ready for users to explore and subscribe to.
Subscribe Plan
To subscribe to a plan, a user needs to access the vendor dashboard and go to the ‘Subscription’ section. Here, users will find a list of all the available plans they can choose from for their subscription.
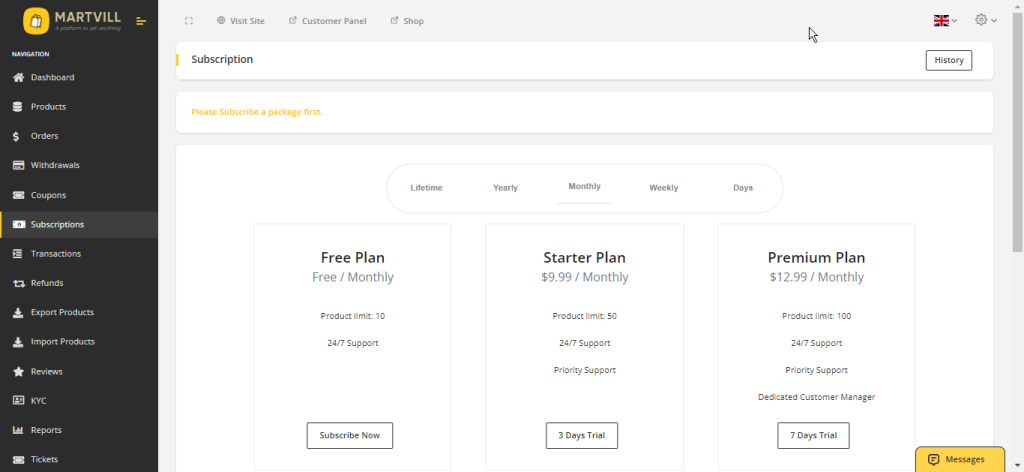
Users have the flexibility to choose from available billing cycles, and each billing cycle may come with different pricing options. This allows users to select the billing duration that best suits their needs, with corresponding prices associated with their choices.
If a plan offers a trial period, users who choose the trial plan will be subscribed directly without going through a payment gateway. This means they can enjoy the trial without making an immediate payment.
When you purchase a trial plan, you will be directed to the following interface, which provides details and options related to your trial plan.
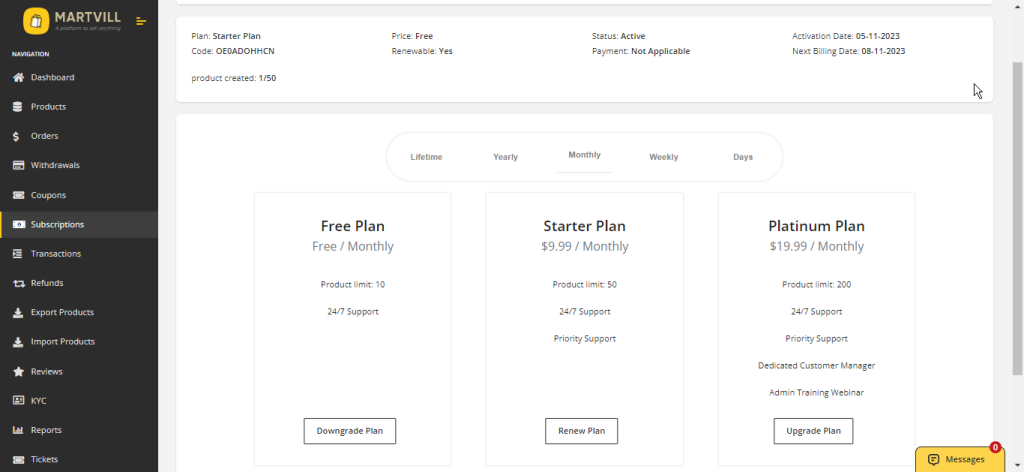
If you wish to renew your plan or make changes like downgrading or upgrading, you have the option to do so. To upgrade your plan, simply click on the ‘Upgrade Plan’ button.
Now you will see a payment gateway Interface
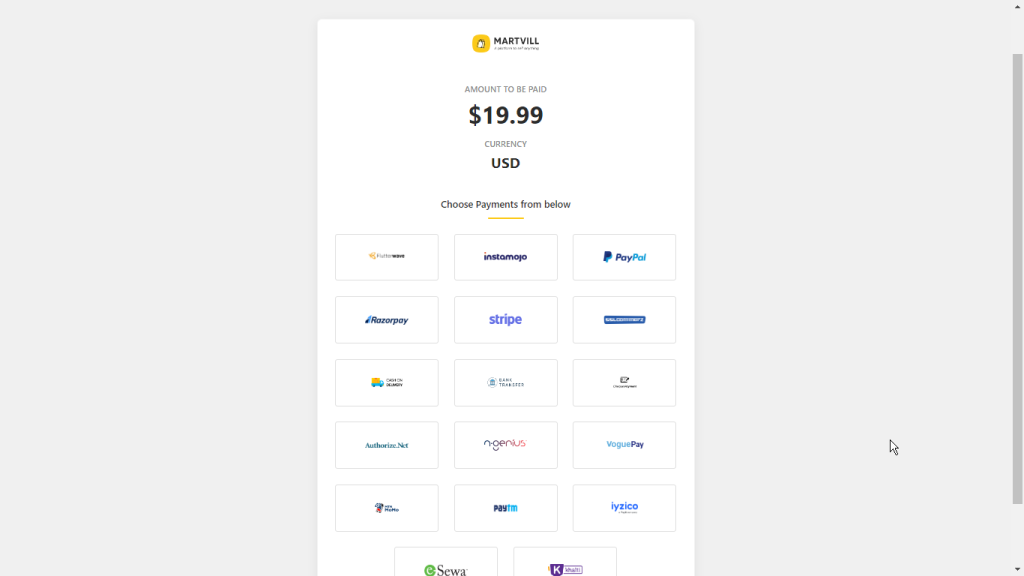
To complete your subscription, you need to choose a payment gateway for processing your subscription payment. After successfully finishing the payment process, you will receive a notification confirming the success of your subscription payment.